Sharp tools help ensure greater bang for your practice’s dental buck
The next time you are preparing for a COHAT, be sure to first take out and evaluate your hand instruments for use
 Those working in veterinary medicine are almost certain to agree small animal dentistry is an equipment-intensive endeavour. Indeed, as someone who works and teaches in the field, I find every visit to a clinic leads to the discovery of new instruments and usages. I have seen everything from novel applications of instruments typically used in human dentistry, to tools crafted specifically for exotics. It seems never ending—and, honestly, it’s quite exciting!
The dental instruments required to ensure a properly performed comprehensive oral health assessment and treatment (COHAT) are powerful tools. Without suitable identification and maintenance, however, these devices cannot live up to this especially important task.
It behooves us to recognize that, if we do not properly know these instruments, we run the risk of using them improperly. Further, without regular maintenance, these tools will not be as effective when they are put to use.
Parts and identification of hand instruments
Our dental hand instruments are of critical importance during a COHAT. As such, when reviewing these devices, we must start by understanding the parts of these instruments that are consistent, regardless of their type (i.e. curette versus scaler versus periodontal probe).
Some expected parts include:
- the handle;
- the shank;
- the terminal shank; and
- the working end.
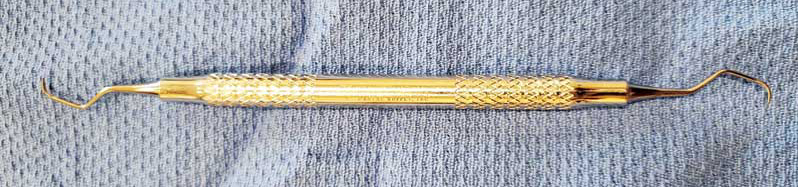
Handles can have a lot of variation, and this is typically dictated by user preference. It is common to see steel or plastic handles, along with a several different types of (optional) supports for the hand-grasp area. Personally, I prefer a basic steel handle, as these are easy to clean and offer a more tactile feel (Figure 1).
Photos by Amy Birchall
The working end is where you see, exactly, which instrument it is you are using. Different instruments have distinct functions, and, hence, differently shaped blades.
The shank is the portion of the instrument which connects the working end to the handle. This can be divided into two sections: a functional shank (inclusive of the whole section) and a terminal shank (the section between the working end and the first angle of the shank) (Figure 2).
The terminal shank is of particular importance. When sharpening an instrument, this portion needs to be lined up properly to ensure the angle of the working end is correct. Additionally, the terminal shank is of great importance when performing a procedure, as its bend is an indicator of where the instrument should, ideally, be used within the mouth. The greater the bend in the terminal shank, the more caudal the instrument should be used in the mouth. Conversely, a straighter terminal-shanked instrument should be used more rostrally in the mouth. This is true regardless of the type of instrument (i.e. scaler versus curette).

A keen understanding of the integral parts of dental instruments helps form the base knowledge required to discuss the proper use of these tools.
A note on sharpness
Before we look at the identification and use of dental hand instruments, it is important to emphasize these tools should be well-maintained and, importantly, sharp. Hand instruments have superior tactile feel as compared to powered instruments. They are excellent at deposit removal, but only if they are regularly assessed for sharpness and touched up as required.
Without regular maintenance, these instruments end up exactly where they should not be: Tucked in a drawer and never used.
Sharpening is easy to do with proper training. All members of the veterinary team can and should learn to identify and sharpen hand instruments, including scalers, curettes, periosteal elevators, elevators, and luxators. These are surgical tools and should be treated as such.
What follows is an overview of hand instruments that are among the most commonly seen and used. It is important to note, however, this is not a conclusive list—there are a lot of other instruments, as well as variations within the ones discussed. For the purposes of this article, we will focus on some of the particularly useful hand instruments for cleaning: the sickle scaler, the Gracey curette, and the universal curette.
Sickle scalers
The sickle scaler is identified on cross section of the working end by two sharp edges that come to a pointed, sharp tip (Figure 3).
This instrument should be used after gross removal of calculus with a powered scaler. While it is excellent for removal of calculus on the crown of the tooth, the sickle scaler cannot be used in the subgingival space, as it can do tremendous damage of the gingiva.

The tip of this instrument can be used in cracks and crevices where a powered scaler tip simply cannot go. I like using this instrument after powered scaling because of its superior tactile feel—this helps me locate and remove calculus I may have missed.
Curettes
Curettes are of critical importance, as these are the instruments that look after the subgingival space.
The Gracey curette can be identified on cross section of its working end by a rounded toe, one rounded edge, and one sharp edge off set at a 70-degree angle (Figure 4). The Gracey curette should be used after a subgingival cleaning with a powered scaler. While the powered scaler can escalate the subgingival cleaning, it will never replace the sharp 70-degree scooping blade this hand instrument provides.
The other option in this category is the universal curette (Figure 5). This instrument is designed for use throughout the entirety of the mouth, both on the crown of the tooth and in the subgingival space, hence its name. It can easily be identified on cross section of its working end by its rounded toe (like the Gracey) and two sharp edges (like a scaler).
Despite the universal curette’s versatility, many (myself included) prefer the Gracey curette for subgingival work because its 70-degree angle, which is superior for plaque and calculus removal below the gumline. That said, the universal curette does, absolutely, have its place in terms of efficiency.
Curettes, regardless of type, should never be neglected, nor forgotten. These are among your best friends during a COHAT and should always be included in your kit.
Maintenance
As mentioned previously, properly maintaining and regularly sharpening dental hand instruments is critical.
As such, following each COHAT, take the following steps:
1) Wash all tools in standard surgical instrument wash.
2) Let dry.
3) Assess sharpness and sharpen as needed (touch-up sharpening should be done frequently).
4) Wash again to ensure any metal remaining from sharpening is removed.
5) Let dry and package for autoclave.
A brief note on autoclaving: While dentistry is not a sterile procedure, autoclaving should be done of all instruments involved (if it is appropriate to do so). It is always best to ensure nothing is carried from patient to patient.
Sharpening

Assessing a tool’s sharpness is easy to do—odds are you will recognize and feel a dull instrument as soon as you use it! Once you become accustomed to using sharp instruments, one that is even slightly dull will feel obvious. Visual inspection can also help identify dullness in a tool: When a light is shone on its working end, a dull instrument will reflect the light, while a sharp instrument will not.
If preferred, you can also use acrylic test strips. With these, an instrument is properly lined up to the test strip, then pressed into it. The tool should ‘bite’ into the strip, and you should hear an audible ‘ping’ once it is removed. (As a note: please do not shave the acrylic, as tempting as it may be!).
The steps for sharpening are, essentially, as follows:
1) Place a few drops of oil on a sharpening stone.
2) Spread the oil out evenly to lightly coat the stone (be careful not to wipe the oil off while spreading it).
3) Hold the instrument, well supported, in your non-dominant hand. Ensure the terminal shank is straight up and down and the tip of the working end is pointed toward you.
4) Place the stone against the working end at the appropriate angle.
5) Hold the instrument still while moving the stone up and down, maintaining the angle.
6) As the stone is moved, ‘flashing’ will be seen against the surface of the stone. (This is normal; remember, you are actively removing metal from the surface of the blade.)
7) End sharpening on a downward stroke.
8) Use a conical stone to remove the metal fillings from the surface of the blade.
9) Wipe the tip with a gauze and follow up with washing.
Armed with these brief instructions (along with the plethora of guides and tutorial videos available online, as well as extensive tutorial videos), there is no reason why you should not be prepared on how to sharpen your scalers and curettes regularly.
Remember, of course, the sharpening of your instruments will not preserve their life—after all, you are removing metal from the tool’s working end. While sharpening will keep your instruments useful for as long as possible, expect to replace these pieces regularly. The more frequently they are used, the more often they should be replaced with new instruments.
Sharpening supplies
Much like dental instrumentation, there are extensive supplies available for sharpening. For basic day-to-day sharpening, the supplies required are relatively simple.

The following readily available items should be included in a basic sharpening kit:
- Arkansas sharpening stone: This is the classic natural sharpening stone. Fine-grit stones are perfect for daily maintenance sharpening.
- Arkansas conical stone: This is a cone shaped, fine-grit stone, used to remove wire edges from the face of blade after sharpening.
- Oil: This is needed as a medium used on the stones (honing oil is most appropriate).
- Acrylic test strip: Nice to have to test or sharpness, but not necessarily required.
The scaler and curette dream team
While powered scalers are amazing and do excellent work when the correct tip is used, hand instruments should always be used in addition. Aggressive scaling or curettage should be avoided, though, as damage to the cementum can occur.
All too often, hand instruments are neglected. As such, when they are eventually picked up, they are found to be dull and not particularly useful—which only prevents them from being used again in the future. Scalers and curettes, when properly maintained, help ensure the crown of the tooth and the subgingival space are perfectly clean. Indeed, scalers can help find and remove deposits on the crown a powered scaler may have missed.
The subgingival space is of particular importance, as this is the ‘root’ of the problem with periodontal disease. If we are not dealing with and ensuring the removal of subgingival plaque/calculus, we are not doing our patients any favours. Powered scalers (depending on type and tip used) can do subgingival work, but they lack the tactile feel and the superior scooping angle of, for example, the Gracey curette.
The next time you are preparing for a COHAT, be sure to first take out and evaluate your hand instruments for use. These tools are a key part of helping our patients maintain a healthy mouth and can help ensure your time and effort shine. The pride felt from doing a job that is proper and thorough is invaluable—it is certain to leave a smile on your face!
Amy Birchall, RVT, is an educator based in Nova Scotia. In 2003, after graduating from the veterinary technology program at Olds College in Alberta, she began her career in rural mixed-animal practice, then took a role at a small animal and exotics practice closer to Calgary, where she developed a love of small animal anesthesia and surgery. Birchall started teaching at Olds College in 2008, focusing first on small animal anesthesia and surgery and, later, dentistry. She joined the faculty of Dalhousie University’s veterinary technology program in 2015, leading lectures and hands-on courses on small animal anesthesia, emergency critical care nursing, pain management, and small animal dentistry.
Reference
- Bellows, Jan, et al. 2019 AAHA Dental Care Guidelines for Dogs and Cats. Journal of the American Animal Hospital Association, no. 2. American Animal Hospital Association, 2019 Mar, 49-69. Crossref, doi:10.5326/jaaha-ms-6933
Sign up for our newsletter
Get all the latest news and features from Veterinary Practice News Canada. Submit your email below to get our twice-monthly newsletter.
Popular Articles
-
1
-
2
-
3
-
4
-
5
Read the Latest Issue

